This article reviews how to access Microsoft Teams, the College's collaboration platform for students and employees, via the LTI link in their Canvas course.
Accessing the Teams Group Space
1.
Open and/or login to Montco Connect, then navigate to Canvas. From your Canvas Dashboard, open the desired course.
2.
Select Microsoft Education in your Canvas course menu.
Note: If you do not see this item listed within your course menu, please contact your course instructor.

3.
IF prompted, sign in to your Microsoft account using your full Montco email address ([email protected]) and password.

4.
Select Teams.
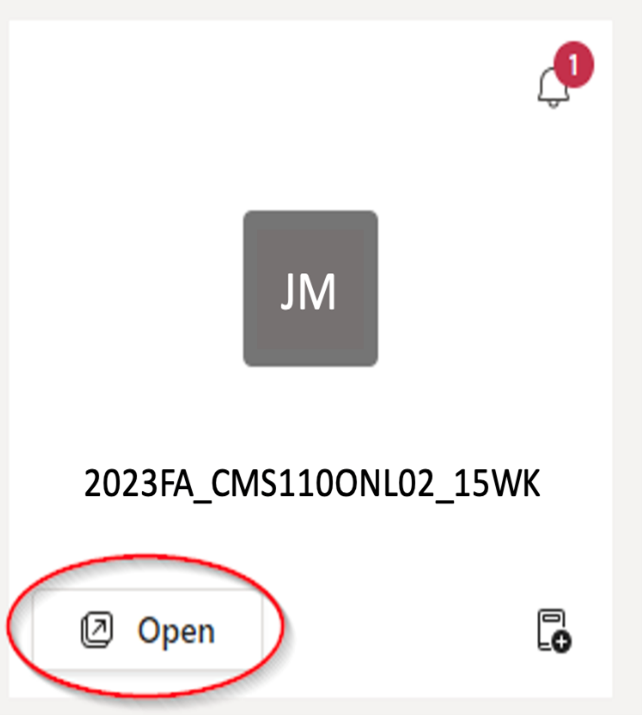
5.
Under the course name and/or ID, select the Open button.
Note: IF prompted to select a preferred option for accessing Microsoft Teams, select the "Use the web app instead" button. If a pop-up subsequently appears, select "Cancel".
6.
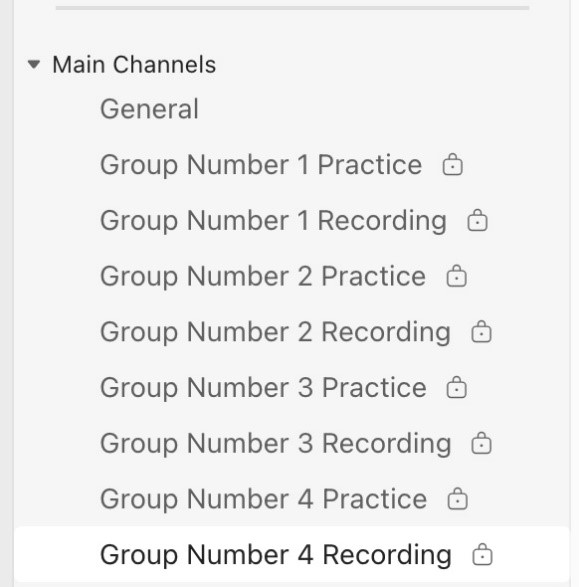
On the lefthand menu within the Teams envioronment, under Main Channel, will be a list of groups.
Channels are individualized spaces and have their own individual storage of content.
In the subsequent example, each group will have two specific Teams Channel spaces: a Group Practice channel and a Group Recording channel. The General channel (space) is for everyone in the course to ask questions or engage in dialogue. The instructor has set up that students would use:
- The Practice channel is designated for each group to rehearse together.
- The Recording channel is reserved for final graded recordings and is the only channel where the instructor reviews and grades the presentations.
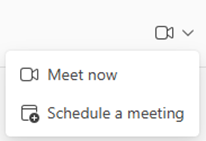
7.
Open the designated channel and select the video camera icon or Meet option in the top-right.
Note: A pop-up window may appear to activate the camera and microphone. Proceed through the necessary prompts. If a pop-up window does not appear, verify that pop-up blocker has been disabled for the site. If there is no pop-up blocker icon in the browser, then select 'Computer audio' and the option related to the computer or external headset. Select the camera icon in the bottom left corner, below the image, to activate the camera.
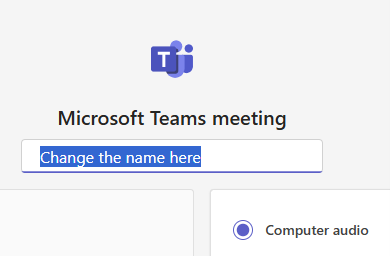
8.
In the new window, a dialog box is under the Teams logo and/or meeting title, where the session's name will need to be added. Highlight the text and enter the name of the meeting to identify the recording afterward.
9.
Verify your computer camera is enabled and/or select the slide bar to activate.
Tip: Double-check your camera's background before logging in.

10.
When ready, select the Join now button.
11.
Select Add participants to add group members to the session.
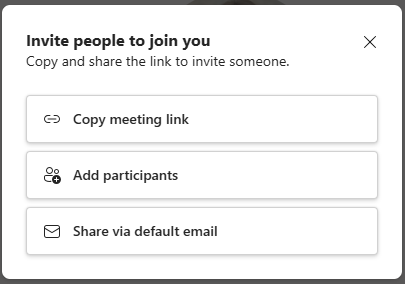
12.
A menu will appear with a list of the group members. Select the Request to join button next to each group member. This calls them.
Note: If the group member is logged in, they will receive a dialog box asking them to join the call.
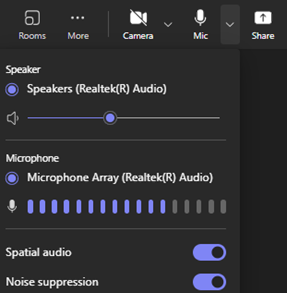
13.
Before practicing or recording, verify that the microphone and camera are working. To do so, select the drop-down arrow next to each one.
When checking the audio, start speaking and observe the bars move back and forth based on your voice. If the bars aren't moving, look for another microphone option and select it from the list.
14.
At the top of the screen is the following list of options related to the session:
- Chat - text participants (people invited to the session).
- People - list of individuals invited to the meeting.
- Raise hand: a way to notify the presenter you wish to come on the microphone. When raising the hand icon, you will also need to lower it afterward.
- Reaction - a thumbs up, smile, clapping, etc. icon will briefly appear over the square of your camera to let the audience and presenter know the feeling.
- Share - share the computer desktop or a specific program. Note: If you want to share audio from a video or presentation, select Include sound.