This article reviews how to record in Microsoft Teams, the College's collaboration platform for students and employees, via the LTI link in their Canvas course.
How to Begin Recording
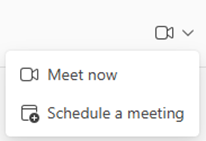
1.
Open the designated channel within Teams and select the Meet option in the top-right.
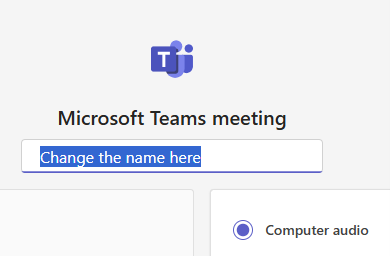
2.
In the new window, a dialog box is under the Microsoft Teams logo and Microsoft Teams meeting title, add a title for the session. Enter the name of the meeting to identify the recording afterward.
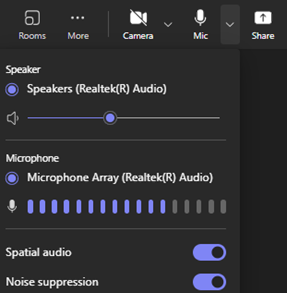
3.
Verify your computer camera is enabled and/or select the slide bar to activate.
Tip: Double-check your camera's background before logging in.

4.
Before practicing or recording, verify that the microphone and camera are working. To do so, select the drop-down arrow next to each one.
When checking the audio, start speaking and observe the bars move back and forth based on your voice. If the bars aren't moving, look for another microphone option and select it from the list.
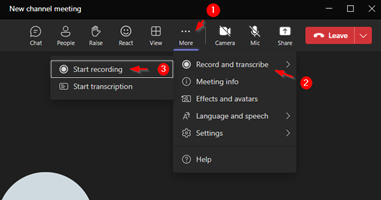
5.
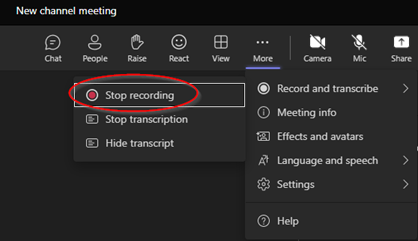
When you and/or your group are ready to begin recording, select More > Record and Transcribe > Start Recording.
6.
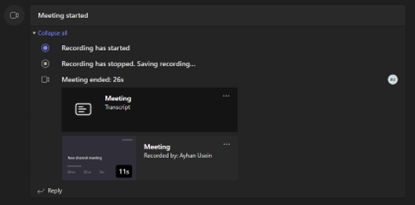
When you are finished recording, select Stop recording (where Start recording was previously located).
Note: Do not attempt to save your recording to OneDrive. If you do, your instructor will not be able to access your recording (see next step). Do not post a link to the recording in the group chat. Your instructor will not be able to access the transcript.
7.
The recording will now be saved in the Teams channels chat space.
Note: The instructor can access the recording in the Teams channels chat or through the Recordings tab. You do not need to send a link.
8.
IF you wish to double-check your work to verify that the recording is clear and audible, click the Shared tab at the top of the Group Recording space. Locate the group recordings folder to find the recording file.
Note: Recordings will be listed by name and date/time.
