Multi-Factor Authentication or MFA is a process that requires additional logins in order to view documents and access systems in a more secure setting. This can be used for viewing documents you may need to use for College, such as tax forms, or programs used by the College such as email.
This article will show you how to go through the steps to keep your information safe. By going through Multi-Factor Authentication, you verify that "you are you" to access sensitive private information.
Note: It is recommended that you use a computer and your mobile device to complete these steps. If you only have access to a phone, you can use the steps in the Set Up without a Computer guide below.
If you have previously set up Multi-Factor Authentication using the Authenticator app and have acquired a new device, please contact the IT Service Desk.
Text Message/Phone Authentication
1.
Go to mc3.edu/mfa from your phone or computer's browser.
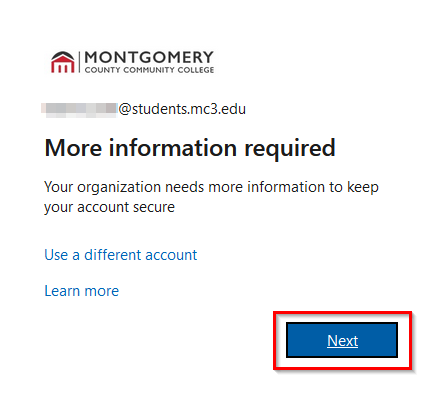
- You will be prompted to provide more information to keep your account secure. Choose Next.
Note: If you are not already signed in, you will be asked to sign in to your Montco account before seeing the more information required screen.
2.
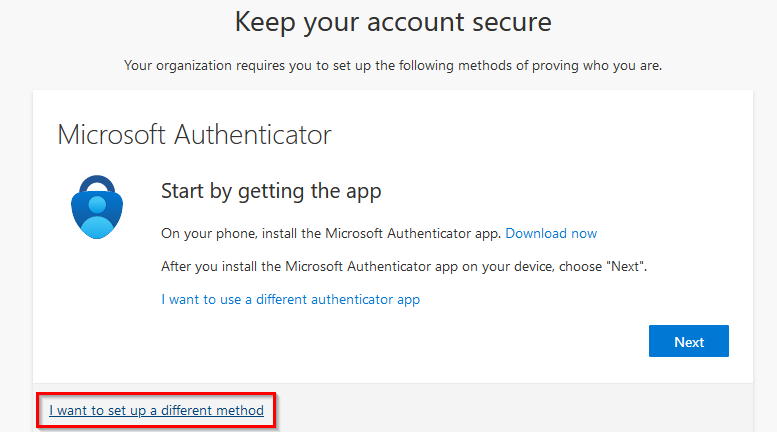
You will be prompted to download the Microsoft Authenticator app.
- Select I want to set up a different method
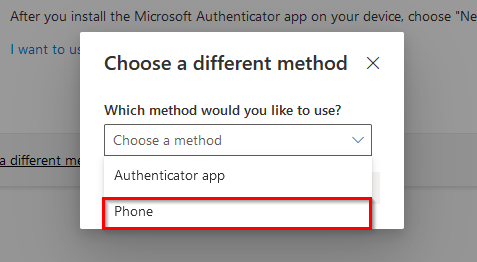
- In the Choose a different method dropdown, choose Phone
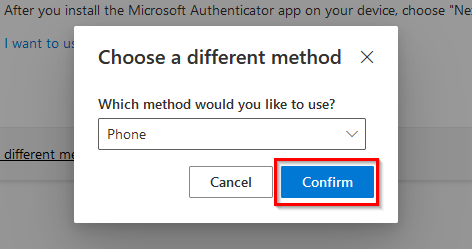
- With Phone selected, select Confirm
3.
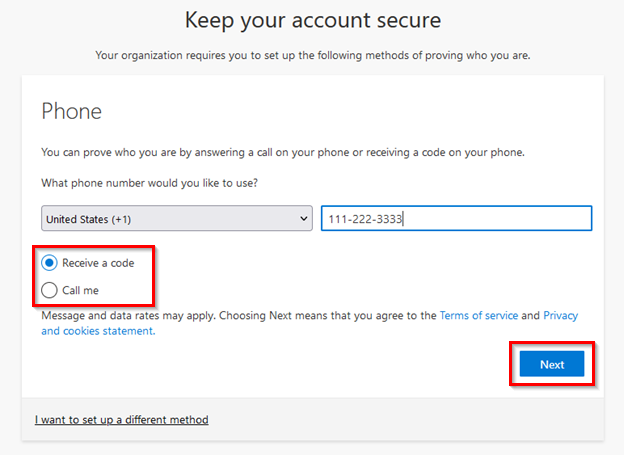
You will be prompted to enter your phone number.
- Choose your Country code from the dropdown menu
- Enter your phone number
- Choose Receive a code or Call me
- Verify that the information you have entered is correct and select Next
4.
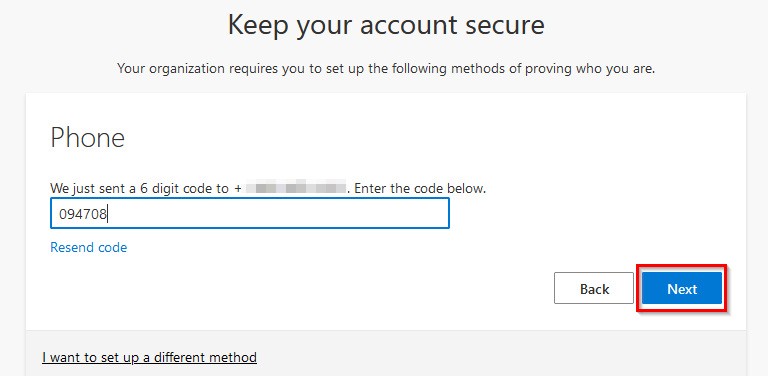
Verify your number
- If you chose Receive a code, you will be prompted to enter your verification code as demonstrated in the image. Enter the code and choose Next.
- If you chose Call me, you will receive a call from an 855 number to verify your phone number
5.
Finishing up
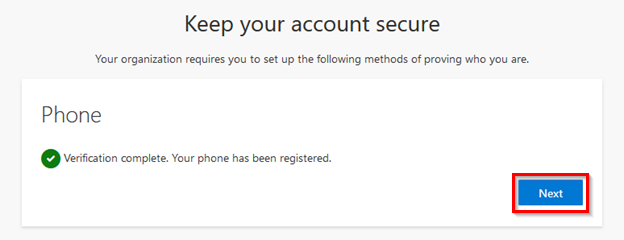
- You will see a message saying that your verification is complete. Choose Next.
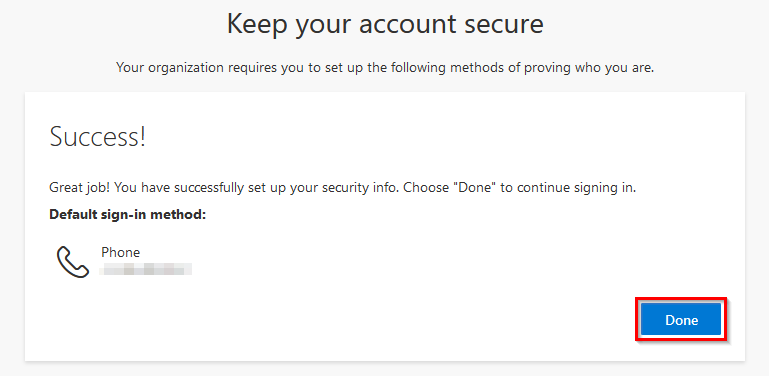
- You will now see a screen that shows your phone has been set up successfully. Select Done to finish.
Authenticator App
1.
Go to mc3.edu/mfa from your computer's browser.
- You will be prompted to provide more information to keep your account secure. Choose Next.
Note: If you are not already signed in, you will be asked to sign in to your Montco account before seeing the more information required screen.

2.
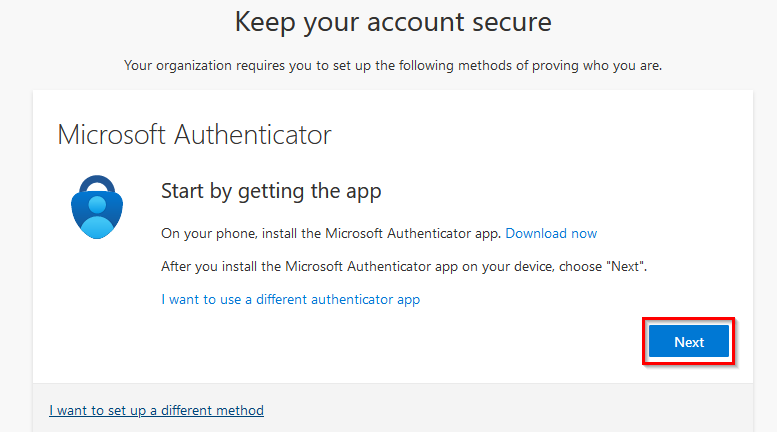
You will be prompted to download the Microsoft Authenticator app.
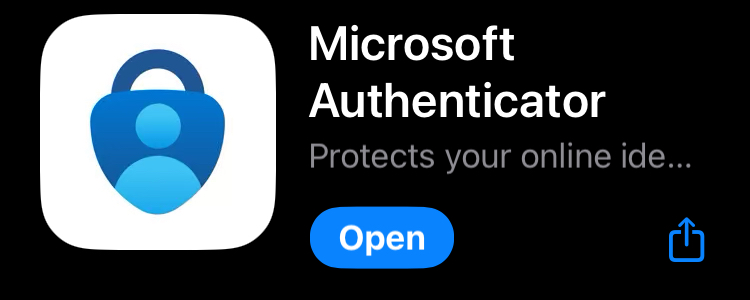
- From your phone’s app store, search for, and install, the Microsoft Authenticator app
- Open the app
- On your computer, choose Next
3.
Using the Microsoft Authenticator app:
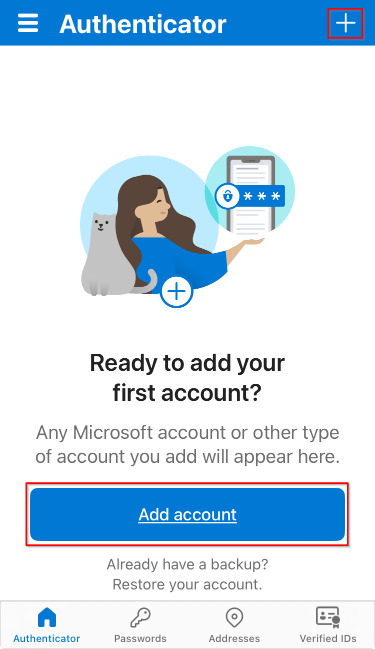
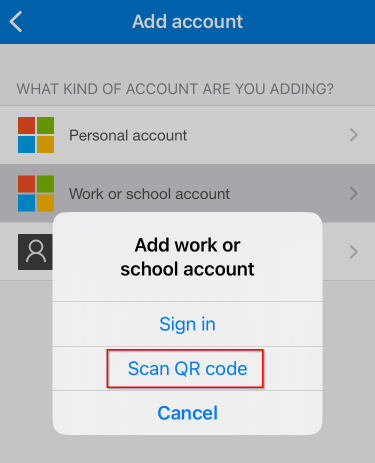
- Add your account by selecting the Add account button or the + icon on the top-right of the app
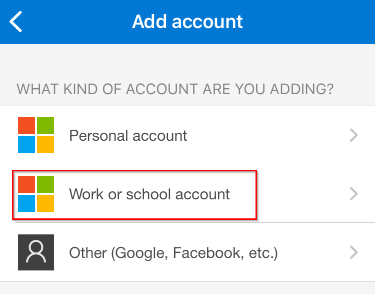
- Choose Work or school account
4.
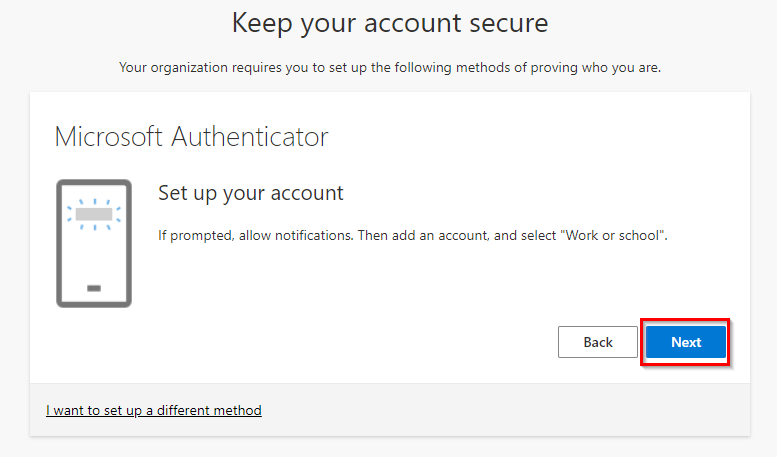
On your computer, for the Set up your account page:
- Choose Next
- You will now see a QR code displayed on your computer

5.
On your phone:
- Select Scan QR code
- Allow the app to access your phone's camera if necessary
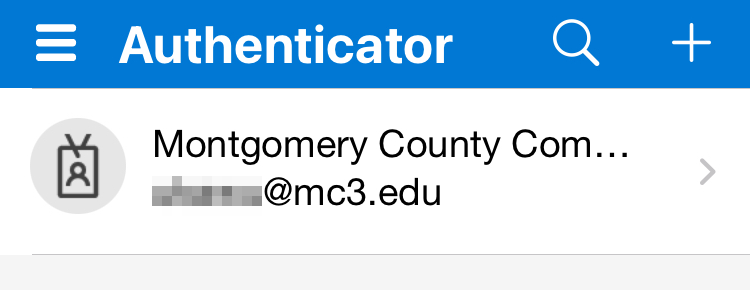
- Point the camera at the QR code to add your account. Your account should now be listed on the Microsoft Authenticator app's home screen.
6.
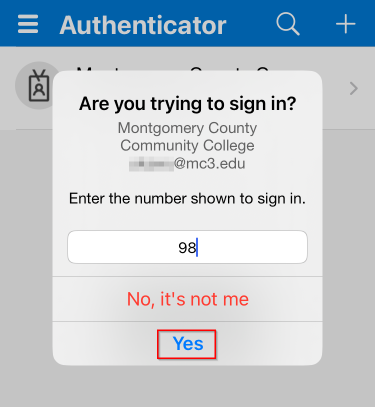
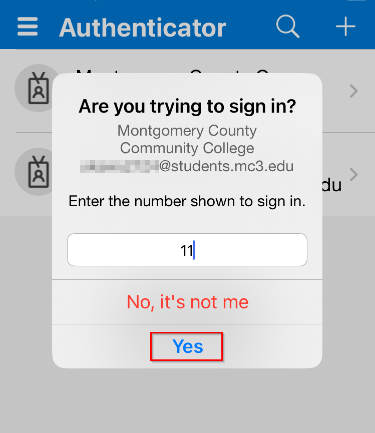
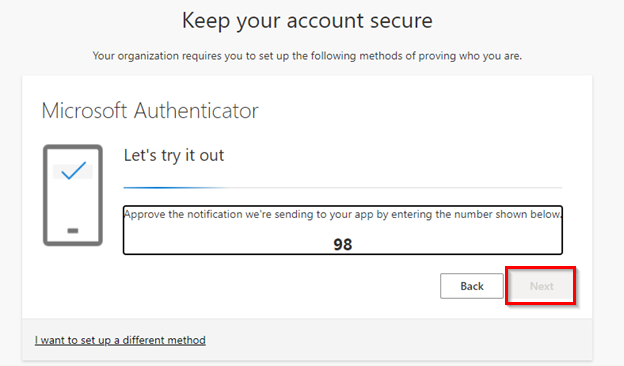
On your computer, you will be asked to enter the number shown on your screen into the app.
On the app:
- Enter the number shown
- Choose Yes
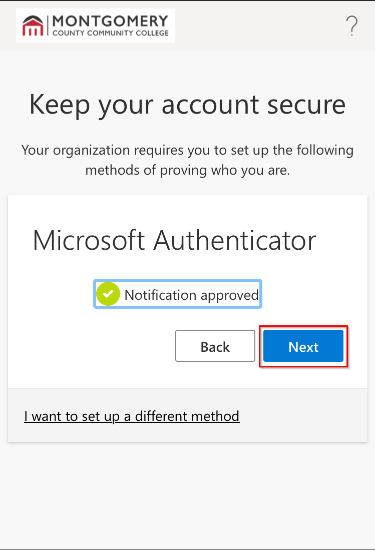
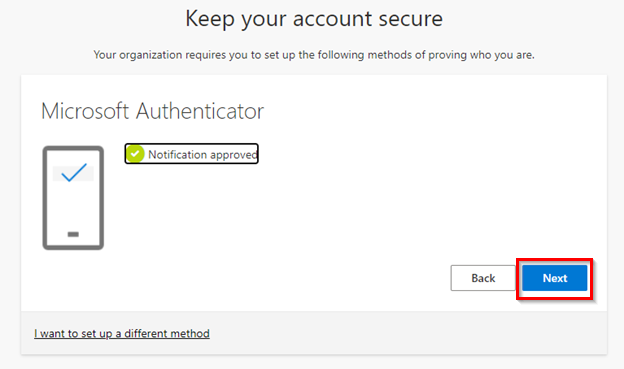
On your computer, you may have to click the Next button after it turns blue. Otherwise, you will get a message showing the notification was approved. Choose Next.
7.
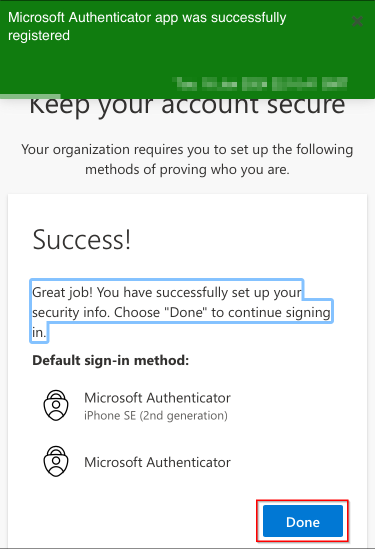
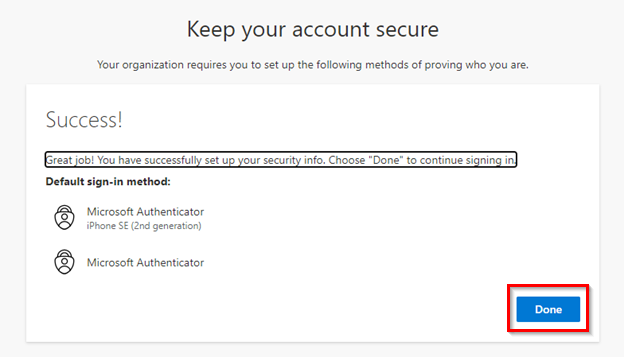
You will now see a page that displays your device and authentication method. Select Done to finish.
Set Up without a Computer
1.
Go to mc3.edu/mfa from your phone's browser.
- You will be prompted to provide more information to keep your account secure. Choose Next.
Note: If you are not already signed in, you will be asked to sign in to your Montco account before seeing the more information required screen.

2.
You will be prompted to download the Microsoft Authenticator app.
- From your phone’s app store, search for, and install, the Microsoft Authenticator app
- Open the app
- Return to the browser and select Next

3.
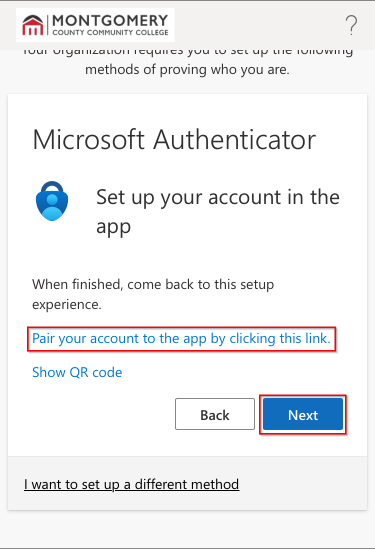
Pair your account
- Select Pair your account to the app by clicking this link
- If your browser asks permission to open another app, allow it
- You should now see the account listed on your Microsoft Authenticator app
- Return to the browser and select Next
4.
Approve sign-in
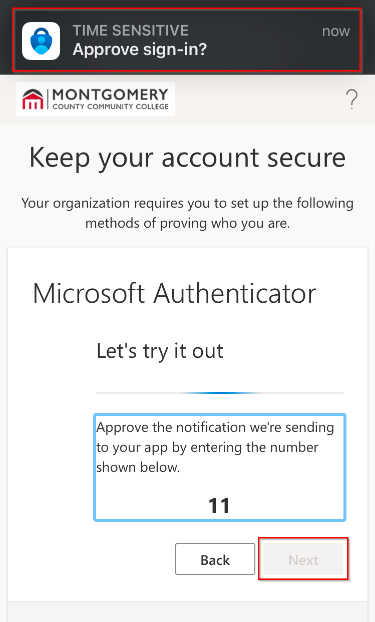
- A number will be displayed on the screen that you must enter in the app
- Select the notification to go to the app
- If the notification disappears, just go to the app to approve sign-in
5.
Enter the number
- Enter the number in the app and select Yes
- Return to the browser
- On the notification approved page, select Next
6.
Finishing up
- You will now see a page that displays your device and authentication method. Select Done to finish
